一. Karma/Mocha 实现 最基本的单元测试
1. 初始化 Vue 项目
首先我们使用
vue init webpack
初始化一个最基本的 Vue 项目, 本着学习目的, 其中 Set up unit tests 选项我们选择 N ,如果为了项目方便, 可选择 Y ,Vue 会帮助搭建一个包含了单元测试模块的项目。
之后我们在项目根目录建立 test/unit 目录, 作为我们单元测试的根目录
2. 安装配置 Karma、Mocha
安装相关的包如下
由于 Vue 项目使用 webpack 搭建, 因此 我们还需要额外安装 karma-webpack
使用 karma-sourcemap-loader 生成 sourcemap
npm i karma mocha karma-mocha karma-webpack karma-sourcemap-loader karma-chrome-launcher -D
npm i karma-cli -g
之后我们初始化一个 karma 的配置文件
karma init
框架选择 mocha、不需要 requireJs、浏览器推荐无头Chrome(ChromeHeadless)、其他选项默认即可
将生成的 karma.conf.js 移动至 test/unit 文件夹下
我们需要关注配置文件中的几个常用配置:
- browsers 测试浏览器数组
- frameworks 使用的测试框架
- reporters 测试结果展示工具
- files 要引入测试的文件, 包括 被测试的源文件 和 测试文件
- preprocessors 对 files 的预处理
我们在 src/common 中建立 utils.js 作为被测试的 Js 文件
// add.js
export const add = (x, y) => {
    console.log(1123);
    return x + y;
};
在 test/unit/specs/common 中建立 utils.spec.js 作为对应的测试文件
import assert from 'assert';
import {add} from '@/common/utils';

describe('#utils.js', () => {

    describe('#add()', () => {

        it("1加1应该等于2", function () {
            assert.strictEqual(add(1, 1), 2);
        });

    });

});
修改 karma.conf.js,test/unit/index.js和webpack.test.conf.js
// karma.conf.js

const webpackConfig = require('../../build/webpack.test.conf');
module.exports = function (config) {
    config.set({
        browsers: ['ChromeHeadless'],
        frameworks: ['mocha'],
        reporters: ['progress'],
        files: ['./index.js'],
        preprocessors: {
            './index.js': ['webpack', 'sourcemap']
        },
        webpack: webpackConfig,
        webpackMiddleware: {
            logLevel: 'error'
        },
        plugins: [
            'karma-chrome-launcher',
            'karma-mocha',
            'karma-sourcemap-loader',
            'karma-webpack'
        ]
    })
};
// index.js

const testsContext = require.context('./specs', true, /\.spec$/);
testsContext.keys().forEach(testsContext);

const srcContext = require.context('../../src', true, /^\.\/(?!main(\.js)?$)/);
srcContext.keys().forEach(srcContext);
// webpack.test.conf.js

'use strict'
// This is the webpack config used for unit tests.

const merge = require('webpack-merge')
const baseWebpackConfig = require('./webpack.base.conf')

const webpackConfig = merge(baseWebpackConfig, {
    devtool: '#inline-source-map'
});

delete webpackConfig.entry;

module.exports = webpackConfig;
其中 index.js 中分两部分 引入了 测试文件和被测试的文件
karma.conf.js 中的 webpack 和 webpackMiddleware 部分是 karma-webpack 提供的配置属性
为了方便, 我们可以在 package.json 中加入
"test": "karma start test/unit/karma.conf.js"
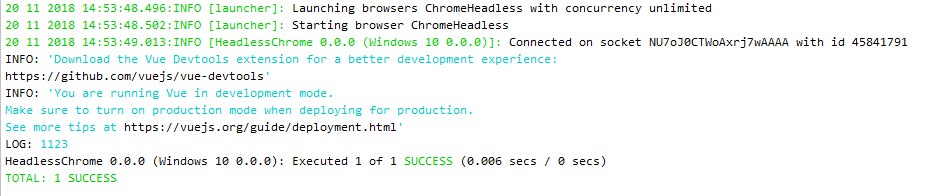
最后运行
npm run test
应该可以看到一条测试通过的消息
二. 加入 Chai 断言库
Chai 断言库 可以让我们写出 高可读性的测试案例
安装 Chai, 并在 karma.conf.js 中的plugins里添加 karma-chai, framework 中添加 chai
npm i chai karma-chai -D
之后我们就可以使用 chai 断言库的写法了
expect(add(1, 1)).to.equal(2);
三. 引入 Vue-Test-Utils 测试 Vue 文件
之前我们的测试都是简单的纯 js 文件,下面我们测试一下 vue 文件渲染的是否正确。
// HelloWorld.spec.js

import Vue from 'vue';
import HelloWorld from '@/components/HelloWorld';

describe('# src/components/HelloWorld/index.vue', () => {

    describe('# 初始化渲染测试', () => {

        it("标题应渲染为 'Welcome to Your Vue.js App' ", () => {
            const Constructor = Vue.extend(HelloWorld);
            const vm = new Constructor().$mount();
            expect(vm.$el.querySelector("h1").textContent).to.equal("Welcome to Your Vue.js App")
        });

    });

});
安装 Vue-Test-Utils 可以为我们减少很多代码量
npm i @vue/test-utils -D
使用 Vue-Test-Utils 重写 HelloWorld.spec.js 之后
import {shallowMount} from '@vue/test-utils'
import HelloWorld from '@/components/HelloWorld';

describe('# src/components/HelloWorld/index.vue', () => {

    describe('# 初始化渲染测试', () => {

        it("标题应渲染为 'Welcome to Your Vue.js App' ", () => {
            const wrapper = shallowMount(HelloWorld, {});
            expect(wrapper.find("h1").text()).to.equal("Welcome to Your Vue.js App")
        });
    });
});
加入 Sinon , 实现测试替代
Sinon 可以实现测试替代, 用来消除测试的复杂度。
首先安装 sinon , sinon-chai , karma-sinon-chai 并将 karma-sinon-chai 加入到 karma.conf.js 的 plugins 和 frameworks 中
npm i sinon sinon-chai karma-sinon-chai -D
之后我们就可以使用 Sinon 进行测试了 , Sinon 中有 Spy、Stub、Mock 三个常用概念。 下面主要记录下 Spy 和 Stub 的使用。
- Spy 是指 根据已有函数 生成一个间谍函数,它会记录下函数调用的参数,返回值,this的值,以及抛出的异常。
使用 Spy 记录 某个方法的调用次数
import {mount, createLocalVue} from '@vue/test-utils';
import api from '@/api';
import HelloWorld from '@/components/HelloWorld';
import sinon from 'sinon';

describe('# src/components/HelloWorld/index.vue', () => {

    const localVue = createLocalVue();
    localVue.use(api);

    describe('# Sinon', () => {

        it("按钮点击后 getMessage 方法 应被调用", async () => {
            const spy = sinon.spy(HelloWorld.methods, 'getMessage');
            const wrapper = mount(HelloWorld, {localVue});
            wrapper.find('button').trigger('click');
            wrapper.vm.$nextTick().then(() => {
                expect(spy.called).to.equal(true);
            });
            sinon.restore();
        });
    });
});
- Stub 可以说是 spy 的加强版,他还能额外操作函数的行为。
使用 Stub 修改某个函数的返回值,跳过原函数的运行。(常用于处理 ajax、异步等)
import {mount, createLocalVue} from '@vue/test-utils';
import api from '@/api';
import HelloWorld from '@/components/HelloWorld';
import sinon from 'sinon';

describe('# src/components/HelloWorld/index.vue', () => {

    const localVue = createLocalVue();
    localVue.use(api);

    describe('# 初始化渲染测试', () => {

        it("按钮点击后 getMessage 方法 应被调用", async () => {
            const spy = sinon.spy(HelloWorld.methods, 'getMessage');
            const wrapper = mount(HelloWorld, {localVue});
            wrapper.find('button').trigger('click');
            wrapper.vm.$nextTick().then(() => {
                expect(spy.called).to.equal(true);
            });
            sinon.restore();
        });

    });
});
加入 karma-spec-reporter, karma-coverage ,istanbul 更好的查看测试结果并统计测试代码覆盖率
首先安装 karma-spec-reporter,karma-coverage, istanbul 并将 karma-spec-reporter,karma-coverage 加入到 karma.conf.js 的 plugins 和 reporters 中,将 babel-plugin-istanbul 加入到 .babelrc 中
npm i karma-coverage karma-spec-reporter babel-plugin-istanbul -D
调整 karma.conf.js 配置文件
// karma.conf.js
module.exports = function (config) {
     config.set({
        // Other setting...

        reporters: ['spec', 'coverage'],
    });
});
调整 .babelrc 文件, 增加测试环境下的 istanbul 插件
"env": {
    "test": {
      "presets": [
        "env",
        "stage-2"
      ],
      "plugins": [
        "istanbul"
      ]
    }
  }
运行 npm run test 控制台就可以打印出清晰的测试结果和代码覆盖率了
代码地址:https://github.com/geminate/vue-unit-test-learn